What’s Cooking: Ice Cubes

Once again the internet has come up big. About a year and a half ago, we highlighted Paula Deen’s english peas recipe, which consisted of butter and canned peas. Today, we have a restaurant staple that some, apparently, have difficulty with executing at home: ice cubes. I’m sure that the technological advances which allow for the widespread use of automatic ice makers and the cheap availability of large bags of ice from the grocery or corner store is certainly to blame for the loss of this crucial skill in American homes.

While I’m pretty certain the recipe has been posted as a joke (unlike Paula’s), that hasn’t stopped the internet from taking its shots. As always, the true joy in recipes like this are found in the comments.

I harvest my own free-range water, so the idea of putting it in a plastic tray and a commercially made electricity-wasting freezer disgusts me. I prefer nature’s method, waiting until the temperature outside drops below freezing

or perhaps

This recipe is horrible! Maybe I should have left them in longer than two minutes (the recipe doesn’t say how long to leave them in the freezer so I just kind of guessed) but mine came out all watery. I won’t be making these again.

Comments are now 13 pages long, so if your work day finds a dull spot, enjoy!

What’s Cooking: Perfect Blueberry Muffins and Red Beans and Rice

You know what’s funny?  This weekend I made my favorite blueberry muffins, thinking to myself “This is such great a recipe, how come I’ve never put this up on the blog?”  So, I took a ton of pictures, typed everything up, and then it hit me.   I have put them up on the blog before!  Duh. I guess I’m getting old.

So, anyway, I figured I’d still share the pictures and just link here to the original post.  I also made a big batch of red beans and rice from this post here so we’ll be eating on that all week.

Hope you had a good weekend!

Toss the blueberries in a tablespoon of the flour mixture to keep them from sinking in your batter.

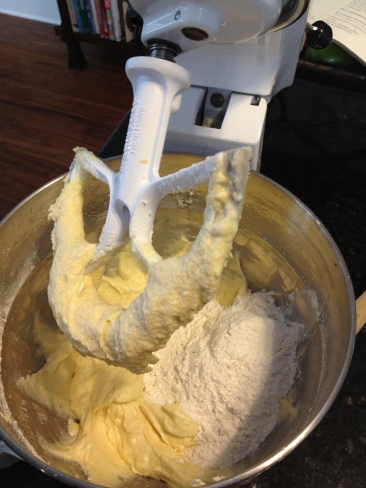
Cream together butter and sugar

Alternate the dry ingredients…

…with the milk. Try to begin and end with the dry ingredients

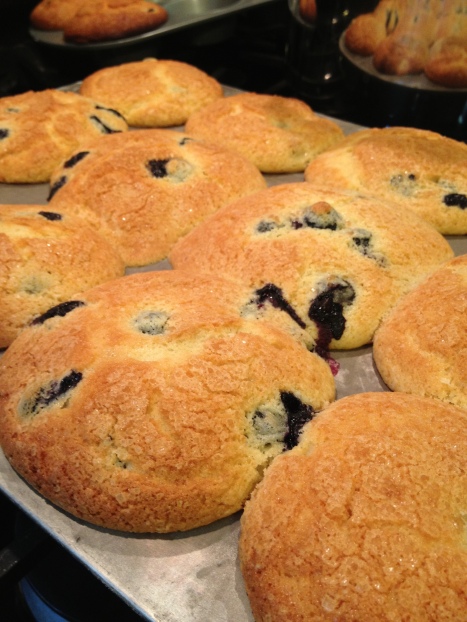
Sprinkle sugar on the tops before baking. I used turbinado for texture, but any sugar will do.

Yum! Hot out of the oven!

Here’s the link again to the full recipe.  I’ll try to be more original next time, but really this is just a testament to how delicious these are!

Tools of the Trade: Favorite Cookbooks

These days it seems like more and more recipes can be found online, and I certainly love surfing the net for meal planning ideas. In fact, $1.25 just bought me a new appendage, um, I mean iPad, and I’m loving it for recipe hunting.  Internet searches are super convenient and usually you can rely on the comments to help you decide if what you’ve uncovered is worth the effort or not. And of course, with my new-found love of Pinterest, I’m finding whole new worlds of recipes to try out.

But, sometimes I just love to sit down with a good cookbook and physically turn the pages. My cookbook collection is pretty solid, with two Gourmet magazine cooking “bibles” and a slew of other options that are either cuisine-specific or targeted in some way. And then there are my very favorite cookbooks, that are already spotted, marked up, dog-eared, and loved.

Here’s a quick run-down of the cookbooks I turn to ALL the time for favorite recipes and new inspiration. In random order, the winners are…

Barefoot Contessa Family Style, by Ina Garten
Honestly, I love everything about this cookbook. The pictures are gorgeous, the recipes are simple but delicious, and Ina Garten’s laid-back personality shines in her writing and techniques. Some of my favorite dishes from this cookbook are the Parmesan Chicken, Tequila Lime Chicken, Linguine with Shrimp Scampi, and she has THE BEST recipe for Mac & Cheese. Some of the recipes seem so simple (like tomato & mozzarella salad), but there’s something to her emphasis on quality ingredients and helpful hints that really make the simplicity work.

Barefoot In Paris, by Ina Garten
My love for this cookbook is very similar to my love for Barefoot Contessa Family Style, except it is amplified by the fact that I ADORE Paris. Ina gives you a little glimpse into her life when she’s visiting Paris and I’m absolutely dying to try out some of her recommendations for French markets and cooking next time I get the chance (someday!). My absolute favorites here are the Profiteroles that my family insists on having every Christmas Eve, the Creme Brulee, Cheese Straws, and the Cauliflower Gratin. All of these recipes are awesome and I find myself making them over and over again with fantastic results.

Everyday Italian, by Giada De Laurentis
This cookbook is my absolute go-to for risotto. I also use it for ideas and inspiration for simple roasts and pasta dishes for an every night meal or for a special occasion. Remind me to tell you about how I exploded a blender one time when I was making the Roast Pork Loin with Fig Sauce. I swear, that kitchen would still have purple spots if I hadn’t replaced the cabinets along the way. But that’s not Giada’s fault and there are so many other great recipes that all use simple ingredients. $1.25 and I have a new soft spot for anything Italian, so this cookbook sees a lot of action these days.

Martha Stewart’s Dinner at Home
This cookbook has in interesting format, based on the premise of preparing 52 meals at home and the recipes are collected together into menus based on the season. Although this is a newer cookbook in our house, I LOVE the Steak with Chimichurri Sauce. Considering how many times we’ve relied on that recipe for ourselves and entertaining, I’d say the cookbook was worth the price just for that recipe alone.

So there you have it.  When I’m looking for inspiration or planning a meal for company, you can bet that I’ve used at least one of those cookbooks in the process.  Even with all the technology out there, I love to curl up with a good [cook]book every now and then.

What’s Cooking: Strawberry Basil Jam

Strawberry Basil Jam on a Biscuit for Breakfast

After the weekend we had, everyone can agree that spring is definitely here.  Along with our love of everything outdoors this time of year come my love of light, fresh flavors from the kitchen.  This Strawberry Basil Jam is ridiculously easy to make and I highly recommend it if you’ve got a bumper crop of basil coming in faster than you can use it.  This recipe calls for a lot of basil, but the flavor really is subtle in the finished product.  You can use other berries if you’d prefer blueberry, blackberry, or even a mixture.  $1.25 just loves anything strawberry, so this was his request.

About 3-4 cups of fresh basil

Bring defrosted strawberries and their juice to a simmer on the stove.

Run basil through a food processor with the juice of one orange, one lemon, and 2/3 cup sugar.

After cooling overnight in the fridge, the jam is thick and set.

Here’s the very simple recipe:

3-4 cups of fresh basil, rinsed

16 oz frozen strawberries, defrosted, juices reserved*

1 lemon, juiced

1 orange, juiced

2/3 cup sugar

Pour the berries into a saucepan and bring to a slow simmer on medium heat.  Place the basil, the lemon juice, the orange juice and the sugar in a food processor.  Pulse until the basil is finely chopped and everything is well blended.  Add the basil mixture to the berries and simmer for about 25 minutes until the mixture has reduced and thickened.  Depending on the berries you use, you may need to mash them with a fork.  I actually just dumped everything into the food processor and gave it a quick spin to break up the big chunks of berries. This is personal preference though, if you like a more “chunky” jam, skip this step.

Refrigerate overnight or until cooled.

* I know I said fresh flavors were perfect for the spring, but I do think the defrosted/frozen berries are key here.  The defrosted berries are much softer and the juices help with the consistency.  If you have a ton of fresh berries on hand, I’m sure you can get the same result, you’ll probably just need to adjust the liquid and cooking time a little bit.  BTW, if you adjust the cooking time a lot, you may want to hold the basil out until later in the process to keep the fresh flavor alive.

What’s Cooking: Chimichurri

Chimichurri on grilled pork

If you’ve had dinner at our house any time in the last year, chances are we’ve made this chiminhurri sauce for you.  There was a stretch of time when I seriously think I made it every weekend for six weeks straight.  Needless to say, we’re BIG fans of this recipe.  I think we love it so much because it’s incredibly versatile.  It works well on poultry, on steak, heck, it’s even good on some toasted baguette.  You’ll have to do a lot of chopping to get to the finished product, but trust us, it’s totally worth it.  Between the red onion, parsley, garlic, and red pepper, this chimichurri pulls together a slew of otherwise strong flavors into a mellow, savory topping for just about anything.

Parsley, Garlic and Red Onion

The finished chimichurri, marinating

1/2 cup minced red onion (about 1/2 onion)

1/3 cup coarsely chopped fresh flat-leaf parsley

1 tablespoon coarsely chopped fresh oregano (I’ve also gotten by with about 1/2 tablespoon dried oregano)

1 tablespoon minced garlic

1/3 cup extra virgin olive oil

3 tablespoons red wine vinegar

1/2 teaspoon crushed red pepper flakes

1 tablespoon finely grated lemon zest

Mix all of the ingredients together in a bowl.  Season with 1- 1 1/2 teaspoons salt and 1/2 teaspoon black pepper.  Add the salt slowly and taste along the way.  Remember you can’t take it away once it’s in there.  Let stand at room temperature for 15 minutes.

We’ve usually served the chimichurri over grilled flank steak, sliced thin against the grain.  Last night we had it over grilled pork and I think we might have the leftovers tonight on some grilled chicken breasts.  It would also be great with some grilled shrimp with a little extra lemon.  Can you tell we like this stuff??  I do think grilled flavors work best, particularly with the bite of the chimichurri and the smoky flavors from the grill.  But if you find it’s great on something roasted or otherwise prepared, we’d love to hear about it.

What’s Cooking: King Cake Cupcakes

King cake cupcakes


The other day, Cupcake made the suggestion of some king cake cupcakes. I thought it was a great idea, until I figured out that she wanted me to make them and not her. But with a weekend of king cake experimentation upon me, I figured the cupcakes wouldn’t be too difficult and they weren’t.

I used the same basic recipe that we’ve been working off of (see here) and took it down to the step where it was time to braid the king cake. This was where I learned how easy the cupcake would be compared to the real deal, as no braiding is required. You see, before I learned this lesson I tried to painstakingly braid a tiny king cake that I would then slip into a muffin tin. It took numerous tries before I finally had a perfectly braiding mini-king cake ready to drop in to the muffin tin. Then I realized it wouldn’t fit!

The result of fitting an oval king cake in a round hole.

As usual, Cupcake stopped by at that moment to casually provide me with the solution to my problem, “why not just make knots? You get the appearance of the braid on top with minimal work.” As per usual, her analysis was spot on. Making a knot was simple. Roll out a single strand, which is like making snakes in pottery class.

Comic from the amazing Gary Larson's Far Side

After you’ve brushed with butter and sprinkled with the cinnamon/sugar mixture simply tie a knot in the middle of the rope. Fold the ends up underneath the know and place in muffin tin. If you so choose, add in a cherry piece before sticking in the oven.

Minimal effort, braided appearance on top

Now set you cupcakes aside (covered) to let them rise a little longer (~45 minutes). While they’re rising, pre-heat your oven to 375. Drop them in and pull them out when they start to turn golden brown on top. This should take about 15 minutes (but ovens do vary wildly). As they are cooling, make the glaze per the same directions (but cut all amounts in half). When cool, glaze and decorate.

King cake cupcakes, your decorating results may (hopefully) vary

For more pictures of the king cake cupcake process, check here.

What’s Cooking: Bacon Jam


You read that right, bacon JAM!  I eyed this recipe for a while before I took the leap (with an eager nudge from my bacon loving sister-in-law) and decided to try it out around Thanksgiving.  There was no doubt in my mind that $1.25’s sister would love it, but I was pleasantly surprised to see that everyone else in our family loved it too.  But really, what’s not to love about this sweet, savory, spreadable bacon??

Not only is bacon jam delicious, but it is also very easy to make.  It takes about 4 hours in the slow cooker so make sure you give it some time.  The bacon jam also keeps really well in the fridge for at least a month…if you can pace yourself that long!

Here’s what you’ll need:

2 lbs good quality bacon, cut into small pieces

2 sweet yellow onions, roughly chopped

3 cloves of garlic, peeled, smashed and/or roughly chopped

3/4 cup fresh coffee

1/2 apple cider vinegar

1/2 cup dark brown sugar

1/4 cup pure maple syrup

And here’s what you do:

Cook the bacon in a frying pan over a medium-high heat.  (Quick tip: I found that a serrated knife works better than a chef’s knife for slicing the raw bacon.)  Then, pull the bacon out of the pan with a slotted spoon and allow it to drain on some paper towels.  Reserve about 1 tablespoon of the bacon drippings and pour off the excess.  Then saute the onions and garlic in the reserved drippings until the onions are translucent.  Add in the remaining ingredients and allow it to come to a boil.  Combine the onion mixture and the bacon in the slow cooker and cook on high for 4 hours.  It will be much thicker and sticky when it’s done.

Transfer the mixture to a food processor (in batches if necessary) and pulse until coarsely chopped (don’t overdo it!!).  Let the jam cool and refrigerate in airtight containers….or just dive right in!  The bacon jam is AWESOME on biscuits and it also makes a really unique appetizer on some crackers or baguettes.  As I type this, $1.25 is testing a crazy off-the-wall recipe using the bacon jam, so be on the lookout for the big reveal of his super secret bacon jam project. (Want a hint? It’s got purple, green and gold sprinkles on top.)  In theory it sounds amazing, but it also has the potential to go oh so wrong…sorry, husband, but it’s true.

Update: it did indeed go wrong.  We tried to make a bacon jam stuffed king cake, but it really didn’t work.  To be fair, I think the actual bacon jam was a little overcooked, so maybe that was the problem, but I think we may have just gotten a little overzealous.  King Cake is good, Bacon Jam is good, but they’re not all that good together.

The Epiphany: Homemade King Cake

Today is the Feast of the Epiphany or Twelfth Night or King’s Day in many corners of the world, including this one. For me, it is the day that you can finally eat king cake. As with many a New Orleanian, my childhood memories of king cake were McKenzie’s or disappointment. While McKenzie’s are still available (in a manner of speaking) from Tastee Donuts, they just aren’t the same. But the classic McKenzie’s style of no icing, no filling is still my go to. Last year, I undertook making my own king cake, and will undoubtedly do so again this year. The process is really easy (if not a bit time intensive), the proof in that is that I’ve been able to pull it off multiple times with success. If I can do it, you can bet your ass you can.

I started with this recipe posted over on Chef’s Lagniappe and through some tweaking by Cupcake (through her excellent baking knowledge) and myself (through totally screwing things up by accident) we came up with what turned out to be a nice light, fluffy king cake. So without further ramblings, here’s the recipe (which was, in fact, posted last year):

Ingredients for king cake:
1/2 cup warm water
5 tsp active dry yeast
1/2 cup plus 2 tsp sugar
2 cups all-purpose flour
2 cups cake flour
1 tsp nutmeg
2 tsp salt
1 tsp lemon zest
1/2 cup warm milk
3 large eggs
2 egg yolks
4 oz unsalted butter plus an additional 2 tablespoons of butter plus extra for greasing the bowl and baking sheet
A few tablespoons of cinnamon and sugar
Marischino cherries (optional)

Ingredients for way too much icing and decorations:
1 lb powdered sugar
2 tsp cinnamon
2 tsp vanilla extract
Milk, enough to make a glaze
Purple, Green and Gold sugar
nonpareils (the rainbow sprinkles–optional)

Directions:
1. Combine the warm water, yeast and 2 teaspoons of sugar in a bowl and set in a warm place until the yeast begins to bubble (around 10 minutes, but may wildly vary–yeast is tempermental).
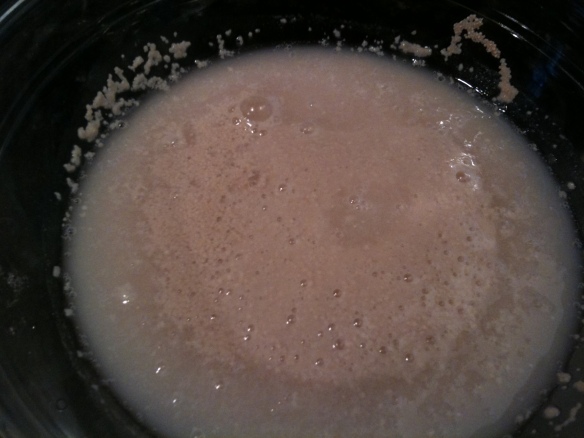
The wee yeasties (that's a science joke!)

It is always good to see that the yeast is alive and kicking. Sometimes the store-bought stuff is DOA.

2. Combine the yeast mixture, both flours, the remaining sugar, nutmeg, salt and lemon zest in a mixer. Add in the warm milk, the eggs and yolks, plus the 4 ounces of butter (melted). Beat that bad boy with a dough hook on medium until the mixture is smooth.

3. Once the dough is smooth, throw some flour on the counter and knead the dough. Add flour as needed until the dough is no longer sticky. Keep on kneading until the dough is nice and stretchy.

4. Transfer dough to a greased bowl. You can use any number of things to grease a bowl when baking, melted butter, Pam, olive oil, etc. Cupcake says it is best to pick something that matches what is in the recipe already to keep a consistent flavor profile (unless you are deliberately trying to introduce another flavor). Flip the dough so the top of the dough is greased. Cover the dough and set aside until doubled (hour and a half/two hours or so).

Dough Man Rising

This is a great magic trick, cover the dough mixture and in about 90 minute it doubles in size!

5. Push the dough down, then transferred back to a lightly floured countertop. Separate the dough into three strands for braiding.

6. Once you get the three strands separated out, create a cinnamon/sugar mixture (50/50 is about what we went with). With your mixture made, melt the remaining 2 tablespoons of butter. Brush the butter on the first strand and sprinkle with the cinnamon/sugar mixture. No need to go overboard, just enough to give a little extra sweetness and flavor to the bread. Repeat for the remaining two strands and braid the three together. NOTE: If you would like to add a filling to your king cake, we would add it as you braid.

The Dusted Strands

I have no reason to add this other than I'm proud of it.

7. Place your undoubtedly beautiful braid on a buttered baking sheet, and make it into an oval. Pinch the ends together to seal closed. Cover the braided oval and let rise for another 45 minutes. Depending upon how long it takes your oven to pre-heat to 350, you’ll want to start that sometime during this step.

8. If you want to add in the McKenzie cherry piece to your king cake, you’ll want to add the cherry pieces into the dough just before dropping it into the oven.

Embedded Cherries

9. Bake until golden brown. This could range anywhere from 25 minutes to 45 minutes depending upon the oven. Once golden brown, set aside to cool.

10. While the king cake is cooling, make the icing. If you’re going for a traditional McKenzie’s like we do, you’ll be able to significantly reduce the amount of icing you make. Mix together the sugar, cinnamon and vanilla. As you’re mixing, mix in just enough milk to get a glaze. Like pornography, you’ll know it when you see it.

11. Once your king cake has cooled, glaze and decorate with alternating purple, green and gold sugar sprinkles. If you added the cherries, use the nonpareils around the cherries. We use just enough glaze to act as a “glue” to keep the sprinkles attached to the king cake. If you lean more towards the icing king cakes, go hog wild.  As you can see below, my skills at aesthetically decorating a king cake are pretty abysmal.  Of course, pretty has no impact on taste.  Just ask the praline.

Ugly, but awesome king cake

What’s Cooking: “Garlic” Bread Pudding (sans garlic)

Silly snafus must run in my family.  And this impromptu weeknight dessert showcases that perfectly.  Here’s the story.  My parents invited us over for dinner last night.  When we got there, they had a yummy dinner in the works and asked me to make some garlic bread.  They handed over a baguette and all the fixings, but when I started working on the baguette, it was completely stale and dried out (snafu #1).  To give you an idea of how bad it was, my dad decided he could snack on some of the dried pieces with a bit of cheese but I think he almost broke a tooth (which I guess could be snafu #2?).  Earlier in the night my mom had confessed that she didn’t have anything for dessert, so I decided I could turn that dried out bread into bread pudding!

So I scavenged around in her kitchen and pulled out some milk, eggs, triple sec, vanilla, sugar, caramels leftover from Thanksgiving, and whiskey.  I chopped the bread into small cubes (which, by the way, is way easier with a serrated knife).  Then I whisked together 2 cups of milk, 2 eggs, a teaspoon of vanilla, 1/2 cup of sugar, and a splash of triple sec.  Spread the bread cubes out in a buttered baking dish and pour the liquid over.  Bake for 25 minutes at 350.

While we were eating dinner, we realized that it wouldn’t really be bread pudding without a sauce, so then I remembered the caramels.  $1.25 suggested a whiskey caramel sauce, so I got to work.  I have no clue how many caramels we had, so you’ll have to improvise…when they were peeled it was a big handful, does that help?  I melted the caramels down in a double boiler with a splash of milk.  Once they melted, we added probably about 1/3 cup of whiskey.  You’ll probably want to add it a little bit at a time depending on how many caramels you have.  BTW, we had WAY too much sauce (snafu #3?), but give me some credit, I was winging it and my original goal was garlic bread!

You’re probably wondering what my big snafu was, considering I just told you about my creative solution to the stale bread.  Well, snafu #4 (or wherever we are in the counting) came when I got the bright idea to blog about the whole thing.  You already know I tend to have more “technical difficulties” than most.  Last night I took that to a whole new level when I tried to use the Word Press App on my iPhone and ended up posting a couple of pictures of the bread pudding LIVE to the blog, without any explanation or anything.  Just some random bready pictures for your viewing pleasure.  If you happened to get that post, sorry bout that!  $1.25 rescued me this morning and pulled them down.  Now they’re in their rightful place in the post where they belong, surrounded by words and explanations like they deserve.  See, this bread pudding was just a big cluster…from start to finish.

But, speaking of the bread pudding, it was really good!  I’m very proud of myself for swooping in to resuscitate the baguette to give it a new purpose in life.  And for the record, I think everyone enjoyed it more than they would have enjoyed the garlic bread.  Just goes to show what a little flexibility and creativity can offer in the kitchen…oh and it helps to have a well stocked pantry.  Garlic bread turned bread pudding!

What’s Cooking: Cheesy Stuffed Shells

We’ve had a bit of a hiatus around here recently, but the good news is that even though the blog has been quiet, our kitchen has been busy!  So I’m finally putting down the pots and pans and picking up the computer to bring you recaps of all the yummy things we’ve been working on over the past few weeks.  First up is this quick and easy stuffed shells recipe.

$1.25 and I came into an abundance of meaty spaghetti sauce not too long ago and when we got tired of same old same old spaghetti, I decided to re-purpose it in the stuffed shells.  So, for starters, you need some sauce.  You absolutely can use store-bought non-meaty sauce, though, so no stressing if you don’t have any “laying around.”

Here’s what you’ll need:

15 oz whole milk ricotta

1 egg, beaten

4 cloves of garlic, minced

4 oz 1/3 fat cream cheese, at room temperature

1 cup shredded mozzarella

1/4 cup fresh grated parmesan cheese

Italian seasoning, salt and pepper

1 package of shell pasta, cooked for about 1/2 of the recommended cooking time

Preheat the oven to 375 degrees.

While the pasta cooks, mix together the ricotta, egg, garlic, cream cheese, 1/2 cup mozzarella, and the parmesan cheese.  Season with Italian seasoning, salt and pepper.

Spread a thin layer of sauce on the bottom of a square baking dish.

Drain the shells well and then gently stuff them with the filling.  By undercooking them, they’ll be a little more resilient to breakage, but you still have to be careful.  Line up the stuffed shells in your baking dish.  You will probably have some pasta left over, but it’s good to have extra in case any of the shells break in the process.

Pour more sauce over the shells.  Top the stuffed shells with sauce and then cheese.  Cover with aluminum foil and bake for about 30-40 minutes until the sauce bubbles.  Then uncover and bake until the cheese is golden brown and bubbly.  Enjoy!  They are perfect for a cold night when you need something warm and hearty.